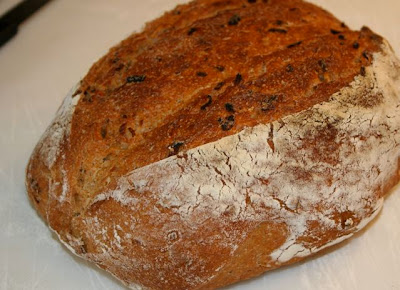
 I felt in the mood to bake some bread. This was very similar to the whole wheat onion sourdough no-knead bread I made last fall. The proportions were probably a little bit different. It rose better this time and came out with a very nice texture. The crust was PERFECT baked in my Le Creuset iron pot. I split it quite deeply right down the middle just before baking and it sprang open just beautifully.
Whole Wheat Onion Sourdough
Whole Grain Sourdough goes perfect with Chicken Soup
 On a cold winter day there’s not much better than a hot bowl of chicken soup and a big hunk of homemade bread. More about the soup later. Let’s talk bread. I haven’t made any in quite a while and I was missing it. My sourdough starter has been sitting in the fridge neglected for a while. Earlier this week I got some out and started feeding it with whole wheat flour. As you saw in my last pizza post, the starter was going great after only a day or so. Power to the yeast! Those buggers really are hard to kill.
I like to make a pretty wet preferment before I actually add all of the flour for the bread. I don’t really know why I do this but it works. I add most of my flour at first and let it ferment for at least an overnight stint if not longer. Then I mix in a bit more flour to get to the dough consistency I want. I believe this gives the yeast a fresh boost of food for the dough to rise. I wanted to make a 100% whole wheat bread with whole grains. This is a challenge because 100% whole wheat breads usually don’t rise that well and end up being very dense. Again, this is because there is less gluten and the sharp edges of the whole wheat chaff cuts the gluten strands that do develop in the dough. That’s why commercial whole wheat breads are usually made with at least 50% white flour. Anyway, here is my preferment after sitting for 12 hours overnight. It was made from about 1 cup of my sourdough starter, 2 cups of whole wheat flour, 2 cups of water, 1/2 cup each of whole kamut grains, whole spelt grains, and steel cut oats. This was just mixed well together, covered with plastic and allowed to ferment.
 The next morning I added 1.5 cups more whole wheat flour and 1 tbsp of salt. I always add my salt after the preferment so as not to inhibit the yeast. After the first ferment there’s a good healthy colony growing and it is much less likely to be inhibited by salt. This dough was kneaded by hand gently for about 5 minutes until the newly added flour and salt were well incorporated. The dough was shaped into a ball and placed in a bowl covered with plastic until almost doubled. I let it sit for about 2.5 hours. It could have risen more, certainly. The dough was shaped into a wide oblong shape and allowed to rise for another 1.5 hours. Here is the dough ready to go in the oven. I have scored the top. I was a little impatient. This could have risen even more. The dough is still a bit on the wet side.
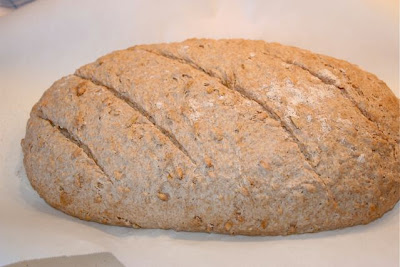 I like to bake my bread using a covered iron pot like all of the no-knead recipes suggest. This helps keep the steam in. So, I let the dough rise on a piece of parchment paper and then it’s easy to lift and place directly in the heated pot without deflating the dough. It was baked at 500F for 30 minutes with the cover, then an additional 15 minutes at 450F without the cover. Here’s the result just out of the oven. It is a nicely shaped loaf. You can tell it has much less oven spring than a white flour bread. I think next time I’ll let it rise even more before baking.
 The crust is perfectly browned and crisp.
 Here’s the inside. I was pretty happy with this. It was not big and airy. As a matter of fact it was kind of dense but certainly not a brick! Inside it was soft and moist. The whole grains were crunchy. It had a very nice whole wheat taste – more intense than a commercial whole wheat bread. It was perfect dunked into the chicken soup.
 Ok, so much for the bread. I know you’re interested in my soup as well. For this soup I used 6 chicken leg quarters. I cooked the chicken and made the broth in my trusty pressure cooker. All I did was take about 2 quarts of water, a good amount of salt, the chicken, and lots of seasonings. I threw in bay leaves, cracked black pepper, a cinnamon stick, dried oregano, dried thyme, some sezchuan peppercorns, a couple of cut up carrots and some celery stalks and leaves. I always keep a bag of celery trimmings in my freezer just for this. This was brought up to pressure and cooked for about 20 minutes. After cooling the broth was strained out and the chicken was deboned. I defatted the broth. To make the soup I softened some onion, carrots, and brussel sprouts in a big pot. I added a cup or so of frozen peas. The broth was added along with the chicken pieces. This was simmered for about 10 minutes just until everything was cooked and all the flavors integrated. Some more salt and pepper to season to taste and it was ready. By the way, the very subtle hint of cinnamon from the broth was wonderful with this.
Leftover Sourdough Focaccia
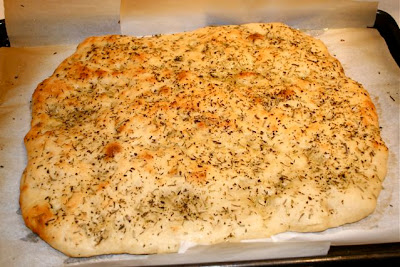 Yesterday was feeding day for my sourdough starter. As usual I hate to throw away perfectly lively babies so I used it to make a focaccia. I didn’t really follow a recipe and certainly didn’t measure anything. But it turned out pretty good anyway. I took almost a cup of sourdough starter and added about a cup of water to it. To that I added a tsp of salt and about two cups of all purpose flour. This was mixed up well, covered with plastic wrap and allowed to sit for a couple hours. After that I kneaded the wet dough in the bowl by folding it over on itself about 15-20 times. This was allowed to rise for another 3 hours. The very wet dough was poured out onto a sheet pan lined with parchment. I had doused the parchment paper with a liberal tbsp or more of good olive oil. I stretched the dough out thin with oiled fingers. It was a very nice texture – very pliable and relaxed. It stretched beautifully. I splashed the top with more olive oil to liberally coat it and then sprinkled it with coarse salt and a blend of dried basil, oregano and rosemary. This was covered with plastic wrap and allowed to rest for about an hour. I popped it into a 450F oven for about 15 minutes until the top just started to show hints of brown. The bread turned out better than I expected. The texture was nice and chewy and the oil made it slightly crispy. My first try at focaccia and it turned out pretty good.
Fargo Sourdough
 Remember the pizza I made a while back? I made it from the discarded starter I was feeding and building up to make my first batch of home made bread using my own culture. No commercial yeasts here. I actually made the bread on Thanksgiving day but am just getting around to blogging about it. Bread is alive! That’s what I love about it. I am proud to have been able to leaven my own bread using yeasts from my local environment. It turned out with so much flavor from the long fermentation that I will definitely be doing this again. Here’s the story of my Fargo Sourdough.
On Tuesday evening I took a cup of the active sourdough sarter and mixed it with 3 cups of flour and two cups of water. I mixed it well, covered it, and left it to ferment. After 22 hours, this is what I got. A wet dough sponge that was frothy and bubbly.
 To the bubbly sponge, I added 1 and 1/2 tablespoons of salt, 1 and 1/2 cups of water and about 7 cups of flour. This was mixed together and allowed to rest for about 30 minutes.
 Once the dough had a chance for the moisture to permeate the newly added flour I tipped it out onto the counter and kneaded it by hand for about 10 minutes until it was smooth and elastic. This was shaped into a ball and placed in a well oiled large bowl. definitely be doing this again. It was covered with a plastic bag and placed in my cool basement to rise overnight. The next morning, after about 10 hours, the result was a well risen dough that reached to the top of the bowl.
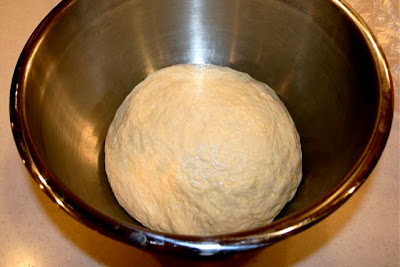
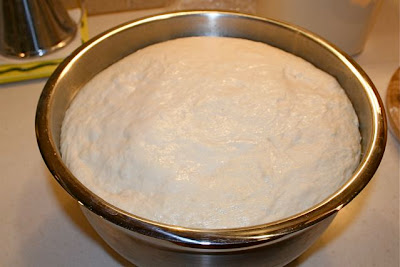 The dough was gently tipped out onto the counter being careful not to deflate it too much. It was divided into four and shaped into loaves. They were covered and allowed to rise for about 2 and a half hours. The dough was placed on a peel, slashed, and baked on a stone in a 450 °F oven two loaves at a time.
 In order to provide the right texture to the crust and get maximum oven spring you need to have a humid oven at the beginning of baking. This is difficult to control in a home oven. I have good luck by first throwing a half cup of water onto the hot oven floor just before adding the bread. I then load the dough onto the baking stones and add another cup of water thrown onto the floor. After a few minutes I add another cup of water and then let it bake until the crust is nicely browned – about 20-30 minutes depending on the size of the loaf.
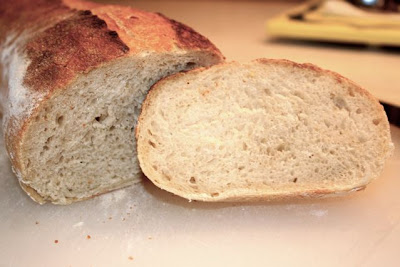
 The result was wonderful if I do say so myself. The crumb was not too big but certainly big enough. The crust was chewy and flavorful. The interior was still moist and soft. The bread was not sour like San Francisco sourdough. I guess Fargo flora are less acidic than that from the west coast. I like to think that my Fargo sourdough is more akin to traditional French sourdoughs. At least the bread was spot on what I hoped for.
Whole Wheat Sourdough Onion No-Knead Bread
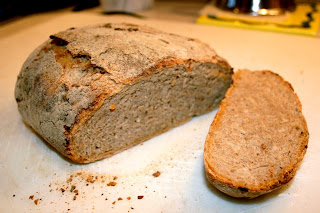 If you haven’t heard about the no-knead bread craze popularized by a New York Times article last year, you are missing out. Dirt easy to make and wonderfully crusty and delicious, no-knead bread is very amenable to modifications. Of course for my first attempt I couldn’t do just a simple white bread. I had to doctor it up. The basic recipe ingredients for the standard bread are: